About the Project
There is a running joke that I love to "break Qlab." And the only way you accomplish that is by making Qlab do things it was never designed to do. I love to push the boundaries of the software and expand my knowledge to make Qlab do almost anything. I embarked on a project to make Qlab into a light version of "Dmitri" in the way it records, maps, and plays back sound fx in a 2D plane. Using Qlab (with alot of apple script) and an Ipad running touch OSC, I was able to record movements in real time and have Qlab create the necessary fade cues to playback the motion.
How it Works
In a nutshell, the program needs to take inputs from the XY pad on the ipad, calculate the relative level of the speakers, and record these movements to play back on command.
The Ipad using "Touch OSC" sends two midi messages to Qlab for the X and Y values. These then trigger a corresponding OSC cue that renames a memo cue (utilized as a global variable) with the raw midi value. These values are then referred to in the following step.
Qlab then calculates the level of the speakers using the sum or difference of the XY midi values put into a parabolic equation. These values are then written to another set of memo cues that are referenced for the "live playback" portion and the "recording" portion.
The live playback portion simply takes the value for each speaker and writes it to the reference audio cue in real time. The recording portion on the other hand takes a few more steps. I will go into more details below, but basically Qlab creates a fade cue about every .3 to .5 seconds (limited by the compiling time of apple script) with the current XY values. Qlab then calculates the time elapsed between fade cues and writes the corresponding pre-wait and action time of the cue. A little reformatting is needed after these cues are recorded, but the motion can then be played back or further edited to scale the timing of the motions (make it faster of slower).
Now the Specifics (for the Nerds)
|
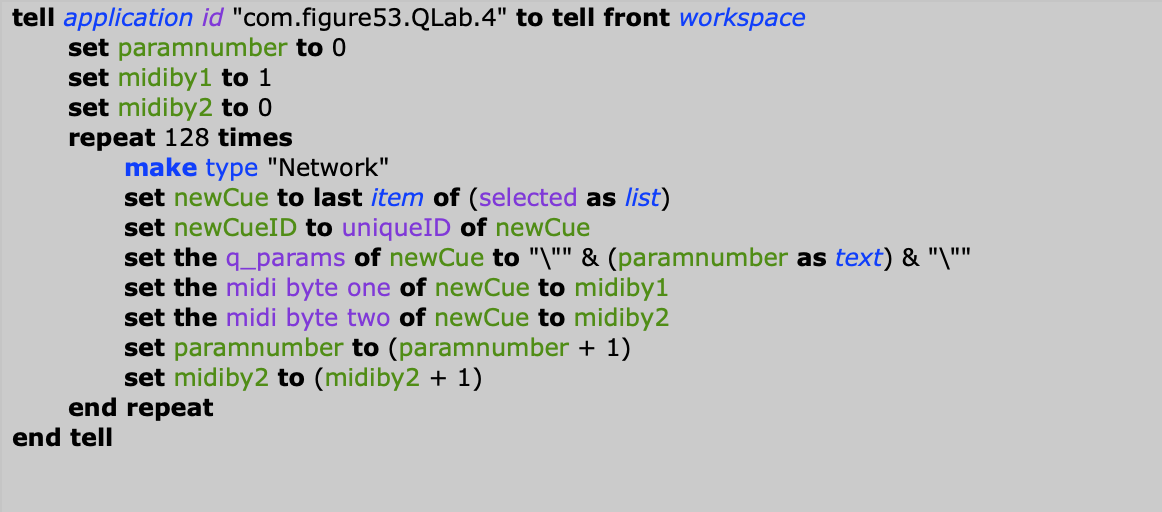
The first Qlab Cue List contains a script to write 128 OSC cues corresponding to every possible X or Y input (Image #1). These cues then target Qlab memo cues "X" and "Y" respectably. Every time a new midi message is received from the touch OSC interface, one of these cues is triggered and writes the midi value as the name for the "X" or "Y" memo cue. These memo cues then act as a global variable for the next step.
|
|
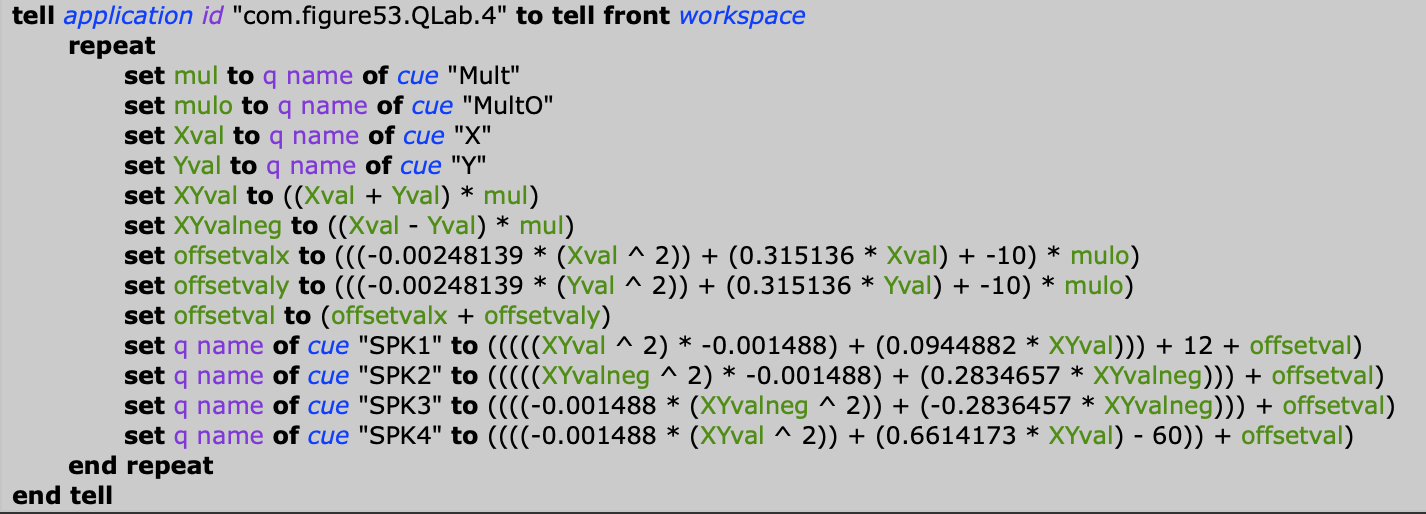
In the second Cue List, a script cue references the memo cues along with two global constant variables (set by the user). The cue then uses these values to calculate the level of each of the four speakers using a parametric curve. The two global constant variables are used to adjust the width of the image and how the audio responds towards the very edges of the XY grid. These equations were created from testing a few points around the grid and audibly determining the proper levels of each speaker for these points. The test points were then inputed into a calculator to find the best fit parametric curve.
|
|
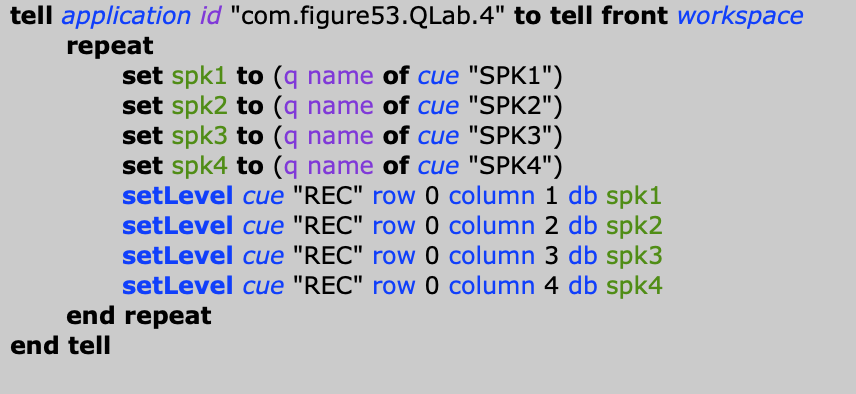
The above script finally writes these values to memo cues (used as global variables) corresponding to each speaker. Finally, these values are inserted into the audio cue to hear the movement live. Hearing these changes live is nice, but what if you wanted to record these values over a period of time and play it back? With that idea in mind a second series of script cues were written. The recording sequence utilizes two sets of script cues: a "manager" cue and a few cues that are triggered from the "manager" cue that basically accomplish the same task. These repeated cues help the resolution of the fades due to the slow computational speed of apple script.
|
|
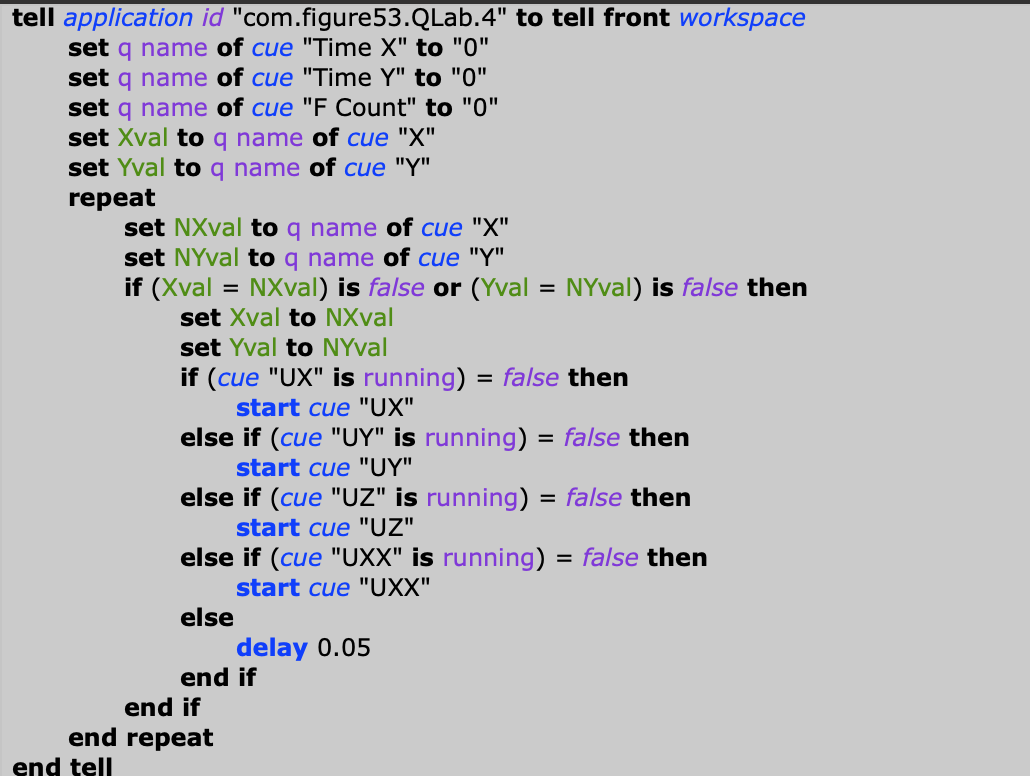
To the right is the "manager" cue. The first section of the cue deals with when X and Y events are changed and how much time elapsed in-between those events. Here, the name of the memo cues (once again used as variables) are reset to 0. The rest of the script manages the four script cues that actually write the fade cues. I found that only running one of these at a time created over .5 seconds of latency between fade cues. Using this method, the script is able to generate a new fade cue every .1 to .2 seconds.
(Continues below) |
|
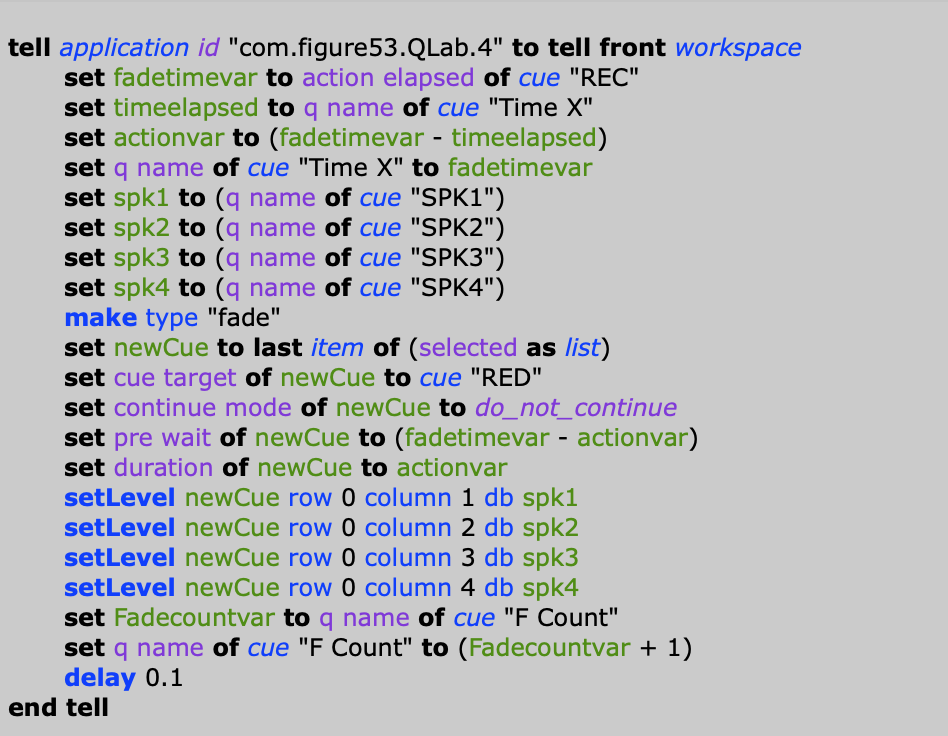
To the right is the script cue that is responsible for writing the fades. The first section calculates the pre-wait and action time of the fade cue. After declaring all of the variables, a fade cue is written with all of the values for level and time inserted. Lastly, the "fade" tally is increased by one to keep track of how many fade cues were created. Once a hot key is pressed to stop the recording, the fade cues are inserted into a group, auto follows are added and the cue stack is ready to play back the audio file with all of the fades mimicking the movement received from the XY pad on the iPad.
|
